Recently one of my laptops hard drive crashed and I’ve to do laptop hard drive data recover for the crashed drive. It was a little complex procedure for an average computer users so I decided to post it on my blog so that others can follow it and do hard drive data recovery on their own rather than spending a fortune on hard drive recovery companies.
Requirements
To recover data from hard drive you will need followings
1) Crashed Hard Drive
Well obviously ;)
2) USB to SATA/IDE Adapter
You will need this adapter to connect the hard drive to the USB port of a laptop/desktop pc. You might not need this if you wish to directly connect your drive to desktop pc internally.
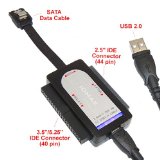
IOMAX USB 2.0 to SATA/IDE Adapteroff Amazon for £17.99 and it works great. It can connect IDE/SATA 1/SATA 2 hard drives to USB port of your computer. It can connect IDE/SATA 2.5/3.5 inch hard drives to USB port.
3) File Scavenger – Data Recovery Utility
This is the data recover utility which will recover data from hard drive. It is free for personal use. There are many data recovery utilities which you can search on Google. I’ve tried some but couldn’t find anything better than File Scavenger.
There are plenty of other hard drive data recovery software which you can try. Following are some of the software which I’ve tried.
4) A lot of patience
Hard drive data recovery is a painfully slow process and you need to have a lot of patience in this process. Sometimes it might take weeks for recovery.
Laptop Hard Drive Data Recovery
Step by step instructions on how to recover data from a laptop hard drive. These instructions are for a SATA hard drive. If you have IDE hard disk then steps are same but you will need different connectors to connect.
If you have new laptops then chances are that you will have SATA 1/2 hard drive.
Step 1 – Remove hard drive from laptop
Carefully remove laptop hard drive from laptop without physically damaging hard drive. Keep it aside.
If you have already replaced the laptop hard drive and installed OS then you can use the same laptop for data recovery. Or else if your laptop is not working then you need to use another computer/laptop if you have it spare. Or else try to borrow one from your family/friends. It might take days and sometimes weeks to recover files so make sure that you have this computer/laptop available for all the time.
Step 2 – Connect laptop hard drive to IOMAX adapter
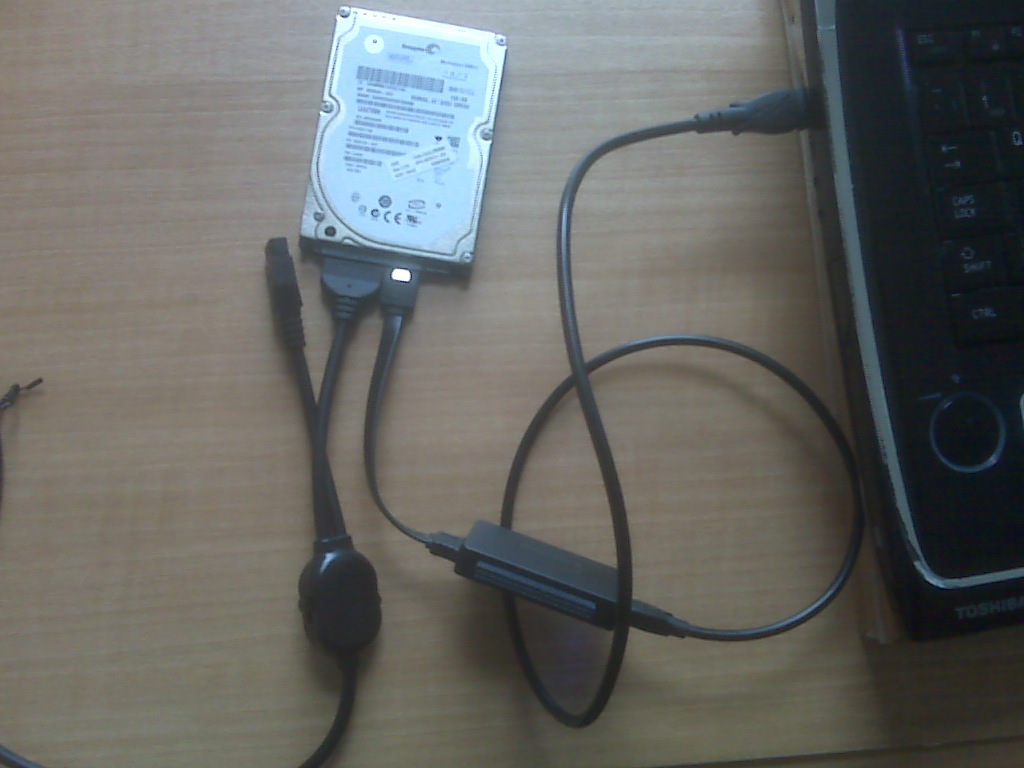
As you can see from the above picture it is very simple and straight forward to connect laptop hard drive to the adapter. You don’t need any driver to install.
First connect the Adapter’s SATA data cable (smaller one with a latch on it) to SATA hard drive.
Connect power cable to the power adapter and plug the power cable to mains socket.
Make sure that the power switch is off.
Connect the SATA power connector (wider one) to the SATA drive.
Turn on the power, you will hear hard drive spinning and let drive spin for 10 seconds.
Then connect the USB adapter to your computer/laptop USB port.
Step 3 – Check for the hard drive visibility
Once connected you will see a small system tray icon indicating that a USB device is plugged in. Now you should see the crashed hard drive in Windows Explorer. If it is not visible or Windows explorer is not responding then give it some time to respond. In my case it took a while when crashed hard drive showed up in windows explorer.
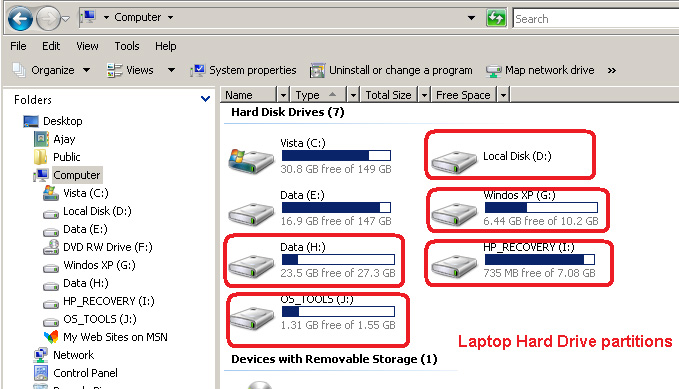
Once it appears you will see all the hard drive partitions (if you had any).
You can click on each of those hard drive partitions and browse for files which you wish to recover. You can copy those files from crashed hard drive to your computer internal hard drive.
Well all done!
Not quite so. It is not so simple, you might see hard drive/partition or you might not see drive at all.
Remember we are trying to recover a crashed hard drive so it is obvious that something has gone bad.
In my case one of the partition was damaged while other partitions were perfectly fine.
I can’t cover all those possibilities which are possible. In case you can’t figure out what to do next, drop a comment and I’ll try to help you out.
Step 4 – Data Recover using File Scavenger
This is the last part of the hard drive data recovery process.
Start File scavenger, you might have to wait for a while before you can use it.
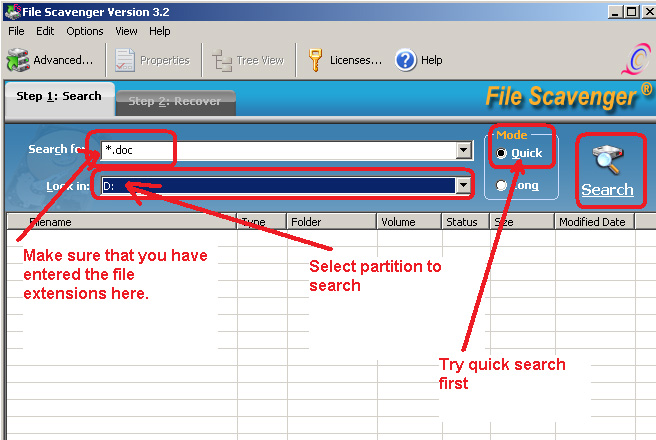
In file Scavenger select the type of files which you want to recover. This is very important as by default it searches for all type of files which might take weeks to search. In the above picture you can see I’ve selected *.doc to recover Microsoft word documents.
Next select the Drive/Partition to search for.
Select Quick mode and click on Search to start search.
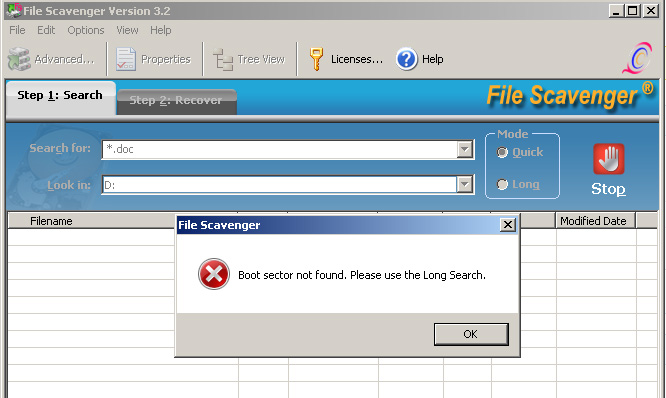
If there is any problem then it will prompt for long search. In my case the boot sector was damaged in the system partition so it couldn’t read any information.
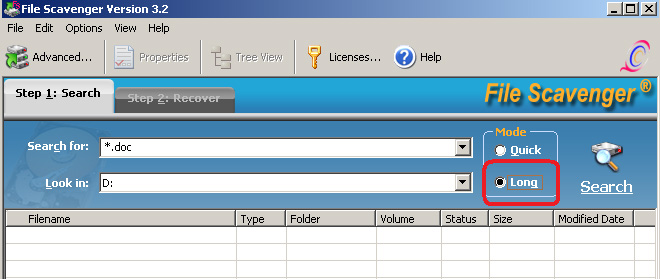
Select the long mode and search again.
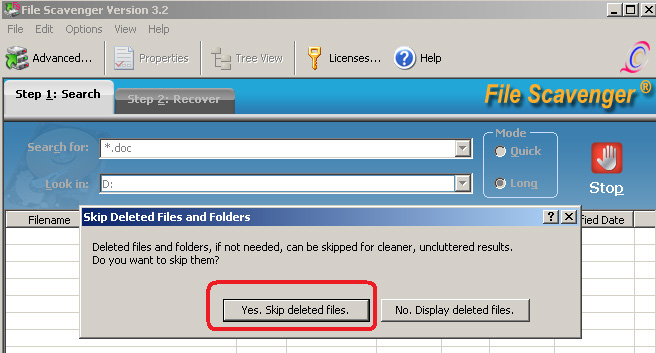
In next prompt you can either select to recover deleted files as well or ignore it.
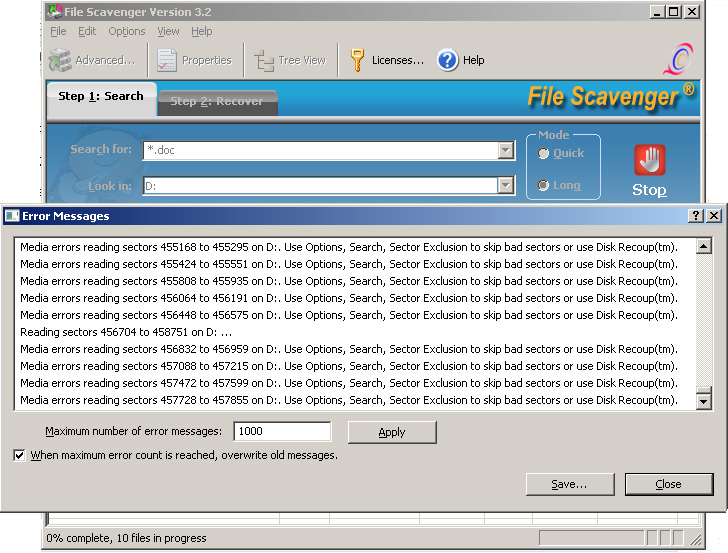
It will start searching and you can see the report in another window.
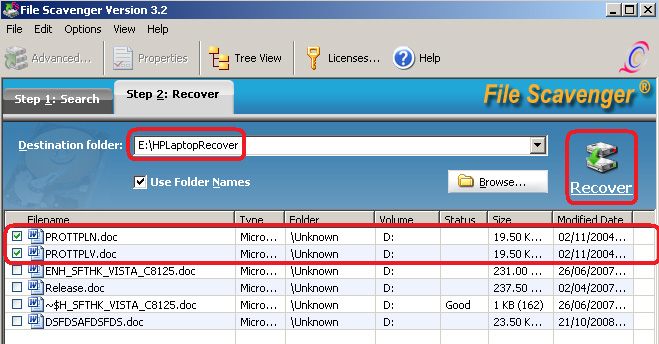
Once search is completed you will see the list of files. You can recover these files from Recover tab. Select the files to recover, specify the destination and recover them.
Desktop PC Hard Drive Data Recovery
For desktop pc hard drive recovery you have to follow the same steps as above. Connect the 3.5inch hard drive to usb port via adapter and use file scavenger to recover the data.
Leave a Reply