In WordPress send post to a friend feature is very useful for your readers. I used this feature first time on Indian Recipes blog and it has been a major hit. On daily basis there are about anywhere between 500-700 visitors sending posts by e-mail to their friends.

Before you install and use E-mail post to a friend feature, you have to decide if your blog posts are really worthy to be recommended to friends? Not all type of content will qualify for E-mail to friend feature. Even I don’t use this feature on my own blog and the reason for this is that all my blog posts are technical in nature. It is very unlikely that someone will send these posts by e-mail to their friends.
The recipe blogs are probably the most like-able to be recommended to a friend. If you have a blog with news or some nice story it can also qualify for recommend a friend feature.
Here is step by step guide on how to install, enable and use Send Post To A Friend feature in WordPress.
I’ll do a demo by installing and configuring this plugin on Homemade Recipes blog.
Step 1 – WP-Email plugin
Well basically it is all about installing a plugin and configuring it. You will need WP-E-mail plugin by Lester Chan. Install this plugin, enable it and then go straight to configure.
Step 2 – Configure Wp-Email plugin
This will need a bit of work to suit your style and could be tricky too. To configure Wp-Email plugin go to E-mail->E-mail options which you can find towards the bottom in left admin menu.
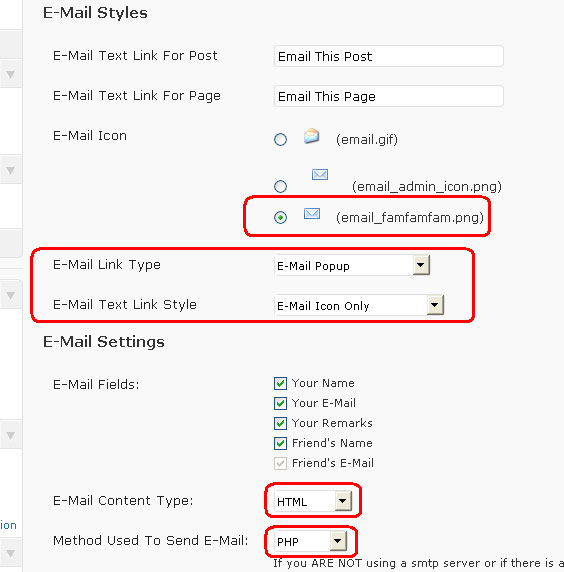
On the configuration page you will find all the settings. I would recommend following settings which works very well for me. If you wish you can change the settings to suit your requirements.

In E-mail Styles leave the SMTP options untouched.
In E-mail Icon I select 3rd option
E-Mail Link Type – select E-mail Popup
This is important. You don’t want these to be pages and get indexed by search engines, do you?
E-Mail Text Link Style – Select E-mail icon only. You don’t want to show text as well. This is bad for SEO as it will add extra and irrelevant text on each of posts/page.
In E-Mail Settings you can select the option which you want to show, I normally select all fields.
E-Mail Content Type – Select HTML
Method Used To Send E-Mail: Leave it default to PHP
You can leave the rest of fields to be default and if you need you can always come back and tweak them to suit your needs.
Step 3 – Add code to theme
You need to add code to show the E-mail icon in posts/pages.
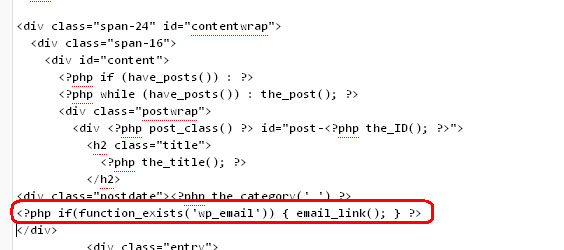
Following is the code which you need to add in theme file.
[sourcecode]<?php if(function_exists(‘wp_email’)) { email_link(); } ?>[/sourcecode]
I add this code just below the title and right side of category in the top on the single post. To do so edit your theme’s single.php or index.php (if single.php file is not present) and add above code to the right side of category. See snap below:

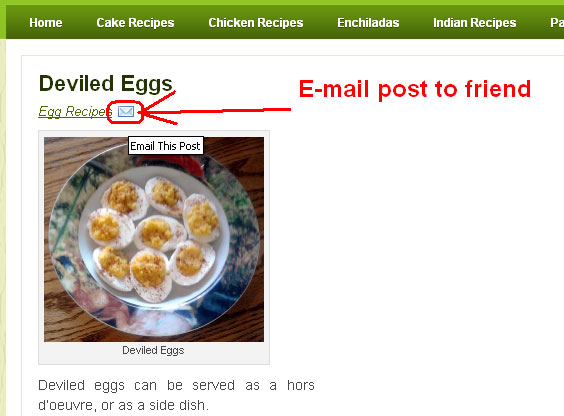
Now check it’s working on a post.

Once you see this click on the E-mail To Friend icon and you will see a pop up window which shows error.
Step 4 – Solving Error page problem
to solve the error showing instead of E-mail form in pop up window you have to go to Settings->Permalinks and just click on Save Changes.
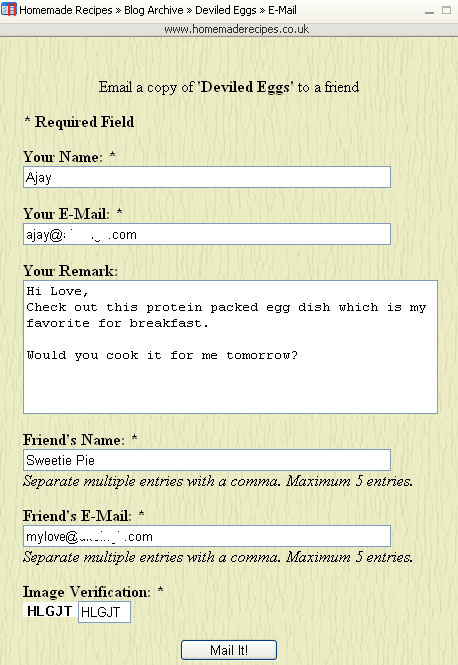
Go back to any post, refresh (CTRL+F5) the page and click on e-mail icon.
Now you should be able to see the e-mail form.

You can change the E-mail subject etc from the settings as you wish.
This is not the end. This plugin also offers you statistics of the e-mail along with all details – sender’s e-mail id, receiver’s e-mail id, subject etc. You can check it in E-mail-> Manage E-mail menu.
This is a great plugin by Lester Chan who is just a student from Signapore, don’t forget to donate him if you like this plugin.
Leave a Reply